AIM DIY: Quick Printable Catnip Kicking Bag

img_6911kickingbag
From 2014-2016 I chronicled my crafty endeavors on the site Adventures-in-Making. I’ve selected a few of those DIY’s, Recipes, and other posts to share on the site.

In typical cat fashion, my kitties seem to like toys that are not intended to be toys at all. You might think it’s a child-safe plug cover, but they think it’s the neatest thing since canned tuna. For a while they have been sharing a repurposed jack-o-lantern drawstring bag filled with catnip- and I decided it was time to give them something a little nicer. They do love the scale of the jack-o-lantern bag, which is long and wide unlike most catnip toys, so I decided to replicate the scale with a super-simple catnip kicking bag.

I wanted to customize the bags a bit, and I kept thinking about the lovely art Tara Bliven shared with us last month. I asked if she would write up a few feline words for us, and she did! You can use the free printable below to make this cat toy even cattier!

img_6743kickingbag

Supplies for two Bags

adventuresinmaking_kickingbagthb

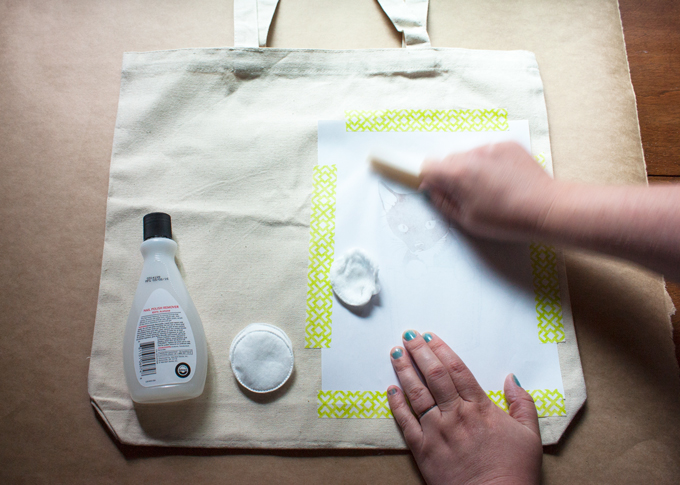
Download and print out the Cat Fabric according to the specifications on the package.

img_6746kickingbag

Cut the fabric in half to make a sheet 10″ x 3.75″. Peel the backing paper off the fabric and stack it on top of the two pieces of thick fabric- with “right sides” facing out.

img_6748kickingbag

Stitch, 1/2″ in, around three sides and leave the fourth open.

img_6750kickingbag

Pour at least a teaspoon of dried catnip in the middle of your pocket…

img_6756kickingbag

Close the last side of the bag, and trim around it with pinking shears to limit fraying (and add character.)

img_6757kickingbag

Repeat with the second set of materials, and you’re done! A super cute sewing project that’s quick enough that you won’t mind when your kitties shed all over it. Now for the fun part…

(Warning, you are about to be bombarded with too many pictures of my kitties.)

img_6765kickingbag

img_6780kickingbag

img_6806kickingbag
The dangers of catnip trips. Very unflattering photos.

img_6871kickingbag

img_6889kickingbag

img_6863kickingbag

img_6908kickingbag

Success.

A couple of notes

  • The printable fabric is quite thin and I didn’t trust it to contain the catnip for very long, so I used it as an outside layer only. The catnip itself is contained within two layers of thicker fabric.
  • If you’re feeling adventurous, try this tutorial to make your own printable fabric!
  • If you are worried about your print running, try this vinegar bath solution to set your ink.
  • Tara is a wizard at decorative writing (and many other arts). Visit her website tarabliven.com  to find out how you can bring more of her awesomeness into your life.

AIM DIY: Add a Kitten Pocket with Polish Remover and Sharpies

img_6722kittenpocket

From 2014-2016 I chronicled my crafty endeavors on the site Adventures-in-Making. I’ve selected a few of those DIY’s, Recipes, and other posts to share on the site.

I like to “joke” that I have a kitten biological clock. Every couple of years I start thinking about how much fun kittens are, and how cute, and how nice it would be to have the pitter patter of little feet.

Dangerous.

To nip this in the bud this year, I’ve signed up for some future fostering, and came up with this little kitten pocket to bridge the gap. It’s based on a picture of Wee Cooper (our last kitten) and I thought I would share it so you can all have a kitten pocket of your very own.

img_6609kittenpocket

Supplies

  • Cotton Tote that kneads needs a kitten. It’s important to use cotton or another natural material because acetone can eat through a lot of synthetic materials.
  • 100% Acetone finger nail polish remover.
  • Cotton pads, balls, or rags.
  • Bone folder or similar tool for burnishing
  • Masking Tape
  • Sharpie Markers – Black and Silver
  • This kitten template* printed with a laser printer or copier. Use the reversed image on the right for transferring.

Step One: Printing and Prepping Your Template

Use a Laser Printer or Copier to print the Kitten Template* on a normal sheet of paper. Black and white is fine. It’s important to use a printer or copier that has TONER instead of ink. The transfer process with move some of that toner onto the fabric. If you try it with ink you’ll end up with a mess!

If you don’t have access to a toner-based printer or copier, or this process doesn’t work for some other reason, never fear! You can use a light table to trace the kitten on your bag, or use transfer paper to apply the design. You can see examples of those processes here and here.

After you have printed your page, cut out the cat and pocket on the right, leaving a large border.

img_6612kittenpocketb

Step Two: Layout Your Design

Decide where you want to put your kitten, and tape it firmly face down on your bag. Make sure everything is as straight and tight as you can make it.

img_6617kittenpocketb

Step Three: Blot and Burnish

Saturate a cotton pad with acetone, and press it into the paper. You will start to see the design through the paper. Saturate a small portion of the design with acetone, then switch to burnishing with your bone folder. Rub the side of the bone folder on the paper to press it firmly down into the fabric. Repeat on small sections of the design, then go back over each portion one or two times, adding more acetone and pressure.

img_6620kittenpocketb

If you can, peak to make sure that you have transferred the kitten. If not, you may want to repeat the process with more acetone and more pressure. If you see the design, move to the next step!

If you don’t see anything at all, there’s a chance your printer won’t work for this process. Don’t fear! You can use a light table to trace the kitten on your bag, or use transfer paper to apply the design. You can see examples of those processes here and here.

img_6623kittenpocketb

Step Four: Fill it in

If you used a smooth material and have a good transfer you could skip this step altogether– it’s up to you. If you’d like, use a black Sharpie to darken in the design. You can use the left side of the template as a reference for portions you can’t see as well on the transfer.

img_6626kittenpocketb

When you have the kitten filled in, use a silver Sharpie to add in the whiskers. It will show up on the black of the kitten and on the light bag as well!

img_6658kittenpocket

When you’re done let it dry for a couple of minutes, pile all your stuff in it, and take a kitten everywhere you go.

img_6713kittenpocket

Purrfect.

*Kitten template includes an original illustration by Alison Lang. We’re happy to share files for personal and educational purposes, but please don’t use it for anything else without our permission. Thanks!

AIM DIY: Paper Spiderwebs to Decorate Everything

From 2014-2016 I chronicled my crafty endeavors on the site Adventures-in-Making. I’ve selected a few of those DIY’s, Recipes, and other posts to share on the site.

Step by step this house is getting properly October spooky. I’m a big fan of decorating with the things I have around, and this collection of tarnished silver and moody ornaments needed one little touch, so I decided to make a spiderweb table runner out of scrap paper and a piece of ribbon.

IMG_1673_paperspiderwebs

SUPPLIES

  • A few sheets of paper, any color you fancy. I used card stock, which was a bit trickier to cut but more durable in the long run.
  • Small clips or tape
  • Your favorite craft knife
  • A hole punch
  • Ribbon
  • The spiderweb templateaim_paperspiderweb

IMG_1682_paperspiderwebs
Once you have printed the spiderweb template, use tape or the clips to secure it to a sheet or two of paper, and cut the spiderweb shape out with a craft knife. You will also punch holes where each X is.

IMG_1693_paperspiderwebs

Cutting Tips

Start trimming the small center pieces out first and move to the large pieces. I actually cut all the inner pieces, then moved on the the next sheet of paper until I have enough pieces. Then I cut the outer shape out of several pieces at once using scissors.

IMG_1701_paperspiderwebs
When you’ve cut out and punched all your pieces, weave a piece of ribbon in and out of the holes to connect several spiderwebs.

IMG_1791_paperspiderwebs
I overlapped the corners of each spiderweb piece to make my table runner…

IMG_1716_paperspiderwebs
and hung them all on one ribbon for a creepy spiderweb banner.

IMG_1735_paperspiderwebs
The possibilities are, as they say, endless! I’m even thinking of creepy spiders to add to them.

The motionless, paper kind.

What’re you decorating with?

AIM DIY: Free Mother’s Day Printable Card and Poster, Thanks for Teaching Me.

IMG_8108
From 2014-2016 I chronicled my crafty endeavors on the site Adventures-in-Making. I’ve selected a few of those DIY’s, Recipes, and other posts to share on the site.

Showing appreciation isn’t always about buying something sparkly, or something chocolate. Sometimes it’s finding the right words to tell someone what they mean to you.

When I think about my mom, I think about all the little things she taught me to do. She taught me to look at things in a different way, to experiment. She taught me how to make teddy bear ornaments out of wallpaper samples, to sew tiny dresses for spool dolls, and to use my imagination. Add my grandmother into the equation and you’ve got all the creative forces that drive me today.

IMG_8155
I decided that it would be fun to build a card that I could use to thank her for all the things she’s taught me. Since she also taught me to share, I thought I’d let you use it yourself.

IMG_8174
I’ve attached two different ways that you can thank your mom for everything she taught you.

Free Downloads

Greeting Card
Poster

momtaughtmehow_poster2
Customize your thank you by adding your face. Take a photo of yourself holding this 8×10 poster. (Your mom loves to see your smile.) Fill in the empty space with your special skill, snap a photo, and email it to your mom. Download the poster here.
momtaughtmehow_card2
Or cut out this mailable card-and-envelope-in-one and to send or hand deliver with a handful of wildflowers. You can download the free printable card here.

IMG_8099
You’ll get extra credit for making something just for her, and you get to remember all the reason’s she’s the one you’re happy to call Mom.

IMG_8163

So, what did your Mother teach you?

AIM DIY: Love Letter Books for Your Valentine

IMG_5874
From 2014-2016 I chronicled my crafty endeavors on the site Adventures-in-Making. I’ve selected a few of those DIY’s, Recipes, and other posts to share on the site.

Valentine’s Day has always been one of my favorite holidays, probably because I’m a big mush at heart. I like to think of it as the Thanksgiving for love– a chance to tell the people you love how special they are, and how much they mean to you.

This year I thought I’d turn all those ideas into a keepsake– a Love Letter Book that two people can pass back and forth until it is filled with compliments, thanks, and well wishes. It’s a perfect activity for kids or adults, and needs only a couple of basic supplies (and the free templates included below.)

IMG_5754

Supplies

• A few sheets of colored card stock or scrapbook paper for your covers.
• A printer, and some basic text weight paper for your inside pages
• A pair of scissors
• A ruler
• A pencil (preferably a mechanical one, you’ll see why.)
• The template pages below

loveletterbook_heartcoverloveletterbook_heartpages
IMG_5766
There are a couple of ways to transfer the template onto your card stock. You can print directly on the card stock (if your printer is up to that), cut out the template form and trace it onto the card stock, or (as I have done here) use transfer paper to transfer the lines to the paper you will use for your cover.

First I lined up the transfer paper under my template and over my card stock…

IMG_5767
Then traced the outside lines with my pencil.IMG_5768
You can see that I also made a mark where the dotted line was on my template.

IMG_5781
Using that mark, I used a the end of a mechanical pencil (lead retracted) to put a score line into my card stock. That will make for a better fold.

IMG_5784
If you aren’t familiar with scoring- it’s a basic process that pushes down the fibers of the paper, and encourages the paper to fold on that mark. Since I am folding diagonally across a sheet of card stock, the score line makes a big difference.

IMG_5787
After I have scored both sides of the cover, I use the smooth end of the pencil to burnish (flatten) the fold.

IMG_5797
I then used the Page Template to cut out a total of 12 hearts, folded them in half, and made two stacks of 6. These will be the inside pages of our two halves of my heart book.

IMG_5803
I took one stack and lined it up with the fold on one side of my cover.

IMG_5808
I made a tiny snip in the bottom fold of the cover and pages to secure my string.

IMG_5809
I cut two pieces of string/ribbon, 12″ each, and wrapped one around the cover and pages on each side, following the fold.

IMG_5818
Then I tied the string firmly in a knot at the top of each heart, binding the heart books together, and leaving me enough extra sting to tie the book closed.

IMG_5823
Once you close the pages and tie the book up you have a lovely two-part book to decorate and fill with love.

IMG_5826

IMG_5908
You can write all the things you admire about your best friend, your sister, your daughter…

IMG_5900
and if you’re lucky you’ll read something just as special in the other half of the book.

IMG_5886
Because Valentine’s Day isn’t just for romantic love- it’s time to show your appreciation of all the people around you.

IMG_5867
But hey, if your Valentine is more of the romantic variety,  that’s okay too.

IMG_5844

AIM DIY: Seed Sling-Shot + Free Template

DIY: Seed Sling-Shot + Free Template
From 2014-2016 I chronicled my crafty endeavors on the site Adventures-in-Making. I’ve selected a few of those DIY’s, Recipes, and other posts to share on the site.

Now, a typical person might throw away the scrappy evidence of a long week of paper making… but no one said I’m typical. My most recent batch of paper contains wildflower seeds, so I decided the scraps would make lovely confetti (and grow, too!)

Using this video tutorial, I made an origami pop-up box perfect for storing a small stash of confetti or flower seeds.

DIY: Seed Sling-Shot + Free Template
I used paper that already had colored pattern on one side, and as an added “bonus”, I printed a corny poem and a thank you message in the box.  So all the people who get one will know to “pull the flaps, fling, and make it bloomy.” I closed each box with a piece of ribbon.

I’m sure you can come up with something less silly- so I’m giving you a pdf template* you can add your own wording to. Click the image below, and go to town!

The template is 8.5×11 inches, and you can resize if you need to. Make sure to use light-weight paper, and fold the printing into the box while you’re working.

SLINGSHOTTEMPLATE

*After you save the file to your desktop, you should be able to open and edit the file in Adobe Reader. If you don’t have Reader, it’s available for free here.